目录
第一章 前言
第二章 油猴头部标签全解
2.1 基本身份信息
2.2 自动更新地址
2.3 是否生效页面(include/exclude/match)
2.3.1 原理
2.3.2 语法粒度和匹配规则
2.3.3 优先级顺序
2.3.4 油猴设置面板分别对应字段
2.3.5 最佳实践速记
2.3.6 总结
2.4 跨域白名单
2.4.1 原理
2.4.2 设置面板对应的字段
2.5 能力清单
2.6 总结
第三章 搭建基础骨架
3.1 项目创建
3.2 油猴配置(meta.json)
3.3 项目配置(vite.config.js)
3.4 数据持久化(GM_setValue与GM_getValue )
3.4.1 原理
3.4.2 使用方法
3.4.3 作用域与生命周期
3.4.4 用法示例
3.4.5 与 localStorage 的对比
3.4.6 注意事项
3.4.7 实战使用
3.5 与后端联调:GM_xmlhttpRequest Promise 化
3.6 不同环境的运行方式
3.7 自动灰度更新(可选)
3.8 审计 & 安全 checklist(提交前打 √):针对打包后的
第四章 实战例子
第五章 源代码地址
入门看小编下面这篇文章:
【谷歌脚本开发】Tampermonkey插件 零基础入门(附源码)
第一章 前言
经过前面一篇基础入门的文章相信大家已经知道了Tampermonkey插件的使用方法了;那么接下来小编就开始带领大家实现一个插件项目的开发,同时使用Vue3+vite做一个项目(注:虽然我们用的是vue3,但是插件的本身就是吃原生技能,大家不要把基础丢掉了)!!通过该篇文章,能带领小编以及大家走到哪里呢?
| 起点 | 终点 |
| 只会写 alert('hello') | 产出可协作、可灰度、可审计的 Vue3 单页插件 |
| 只会“板砖” | 清楚插件的的各个涵义 |
| 全局变量满天飞 | 用 GM_setValue / GM_getValue 做 加密持久化 |
|
如何对接接口 |
用 GM_request 封装出可用的接口 |
| 不同环境的运行方式 | 配置多个命令实现不同环境的切换 |
| 复制粘贴发版本 | 一条命令 npm run build 自动出 .user.js + CI 灰度 |
等等 …
第二章 油猴头部标签全解
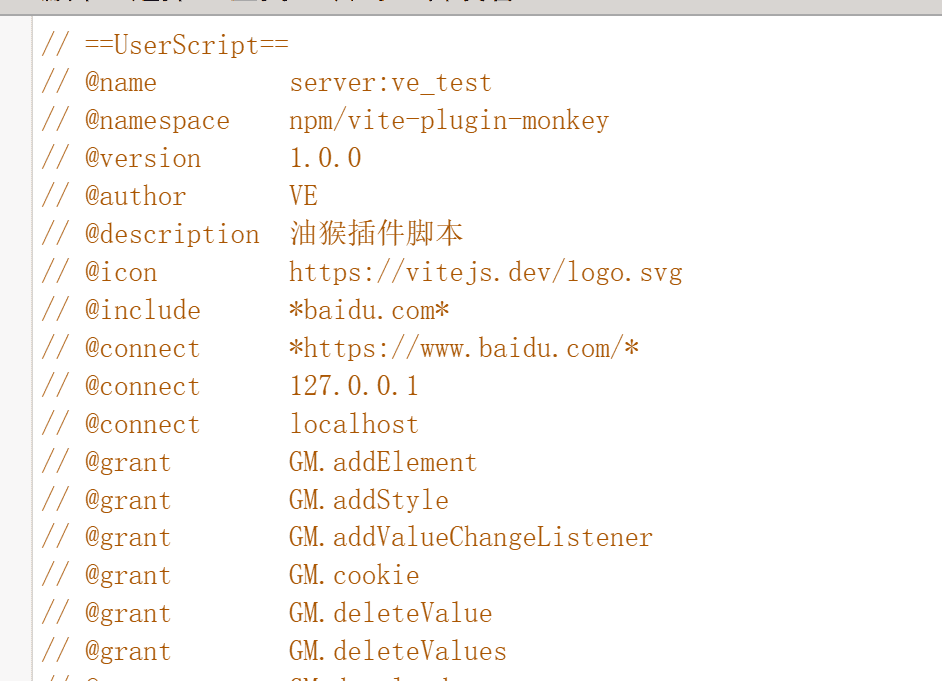
首先把下面这段油猴(Tampermonkey/Greasemonkey)脚本的“头部”逐行拆开讲清楚,基本涵盖了大部分。大家只要记住:所有以// @开头的行都是“元数据指令”,它们不会被执行,而是告诉脚本管理器“我是谁、我能干什么、要在哪些页面跑、能访问哪些资源”。
// ==UserScript==
// @name         test
// @namespace    npm/vite-plugin-monkey
// @description  这是一个脚本,加点描述
// @author       VE
// @version      20251212.1751
// @icon         https://vitejs.dev/logo.svg
// @downloadURL  http://x.xx.xxx.xxx/monkey/test.js
// @updateURL    http://x.xx.xxx.xxx/monkey/test.js
// @include      *baidu.com*
// @connect      *https://www.baidu.com/ *
// @connect      127.0.0.1
// @connect      localhost
// @connect      192.168.124.xxx
// @grant        GM.addElement
// @grant        GM.addStyle
// @grant        GM.addValueChangeListener
// @grant        GM.cookie
// @grant        GM.deleteValue
// @grant        GM.deleteValues
// @grant        GM.download
// @grant        GM.getResourceText
// @grant        GM.getResourceUrl
// @grant        GM.getTab
// @grant        GM.getTabs
// @grant        GM.getValue
// @grant        GM.getValues
// @grant        GM.info
// @grant        GM.listValues
// @grant        GM.log
// @grant        GM.notification
// @grant        GM.openInTab
// @grant        GM.registerMenuCommand
// @grant        GM.removeValueChangeListener
// @grant        GM.saveTab
// @grant        GM.setClipboard
// @grant        GM.setValue
// @grant        GM.setValues
// @grant        GM.unregisterMenuCommand
// @grant        GM.webRequest
// @grant        GM.xmlHttpRequest
// @grant        GM_addElement
// @grant        GM_addStyle
// @grant        GM_addValueChangeListener
// @grant        GM_cookie
// @grant        GM_deleteValue
// @grant        GM_deleteValues
// @grant        GM_download
// @grant        GM_getResourceText
// @grant        GM_getResourceURL
// @grant        GM_getTab
// @grant        GM_getTabs
// @grant        GM_getValue
// @grant        GM_getValues
// @grant        GM_info
// @grant        GM_listValues
// @grant        GM_log
// @grant        GM_notification
// @grant        GM_openInTab
// @grant        GM_registerMenuCommand
// @grant        GM_removeValueChangeListener
// @grant        GM_saveTab
// @grant        GM_setClipboard
// @grant        GM_setValue
// @grant        GM_setValues
// @grant        GM_unregisterMenuCommand
// @grant        GM_webRequest
// @grant        GM_xmlhttpRequest
// @grant        unsafeWindow
// @grant        window.close
// @grant        window.focus
// @grant        window.onurlchange
// ==/UserScript==
2.1 基本身份信息
@name 脚本在管理器列表里显示的名字,可随意改。
// @name test@namespace命名空间,用来区分同名的不同脚本;通常写作者主页、仓库地址或任意唯一字符串即可。
// @namespace npm/vite-plugin-monkey@description,简介,插件描述
// @description 这是一个脚本,加点描述@author,落下你的大名!
// @author VE@version版本号,管理器用它判断要不要更新。建议用“语义化版本”如 1.2.3,这里用日期时间也行。
// @version 20251212.1751@icon管理器里脚本前面的小图标,可省。
// @icon https://vitejs.dev/logo.svg2.2 自动更新地址
downloadURL:管理器“检查更新”时会把整段脚本下载覆盖旧版。updateURL:如果把元数据单独拎出来存成 .meta.js,管理器只拉元数据比较版本,节省流量。 (两个都写时,优先用 downloadURL。)
// @downloadURL  http://x.xx.xxx.xxx/monkey/test.js
// @updateURL    http://x.xx.xxx.xxx/monkey/test.js
2.3 是否生效页面(include/exclude/match)
2.3.1 原理
通配符说明:
*
// @include *baidu.com*2.3.2 语法粒度和匹配规则
| 特性 | @include / @exclude | @match |
| 通配符 | * 可以代表任意长度字符(包括 /、?、&) | 不允许通配符;只能用更严格的“分段式”语法 |
| 协议 | 可省略,省略后匹配 http + https | 必须显式写出 http:// 或 https:// 或 *:// |
| 域名(/主机) | *baidu.com* 这种写法合法 | 只能用 *.baidu.com(子域)或 baidu.com(精确) |
| 端口 | 通配符里一起扫掉 | 必须显式 :8080 或 :* |
| 路径 | 通配符随便写 | 只允许固定路径 + 末尾 /* 或 / |
| 大小写 | 不敏感 | 不敏感 |
| 性能 | 管理器内部转成正则,稍慢 | 直接映射成浏览器原生匹配,更快 |
| 错误容忍 | 写错了也能“尽量猜” | 写错一个字母整条规则作废,控制台直接报错 |
案例理解:
需求:让脚本在https://www.baidu.com/s?wd=hello 和 http://map.baidu.com/都生效。
// 用 @include 一句话搞定:
// @include  *://*.baidu.com/*

// 用 @match 需要写两条(子域必须单独列)
// @match   *://www.baidu.com/*
// @match   *://map.baidu.com/*

// 如果以后百度冒出 a.baidu.com b.baidu.com
// @include 那条自动覆盖;
// @match 必须再手动加如对应的,否则不生效。
2.3.3 优先级顺序
先算 @exclude —— 一旦命中直接踢掉,后面不再看。再算 @include / @match —— 只要有一条命中就放行。两者同时存在时:并列关系,不互斥;管理器会把它们一起编译成正则。用户自己在管理器编辑界面额外填的 include/exclude 最后叠加,脚本里改不了。
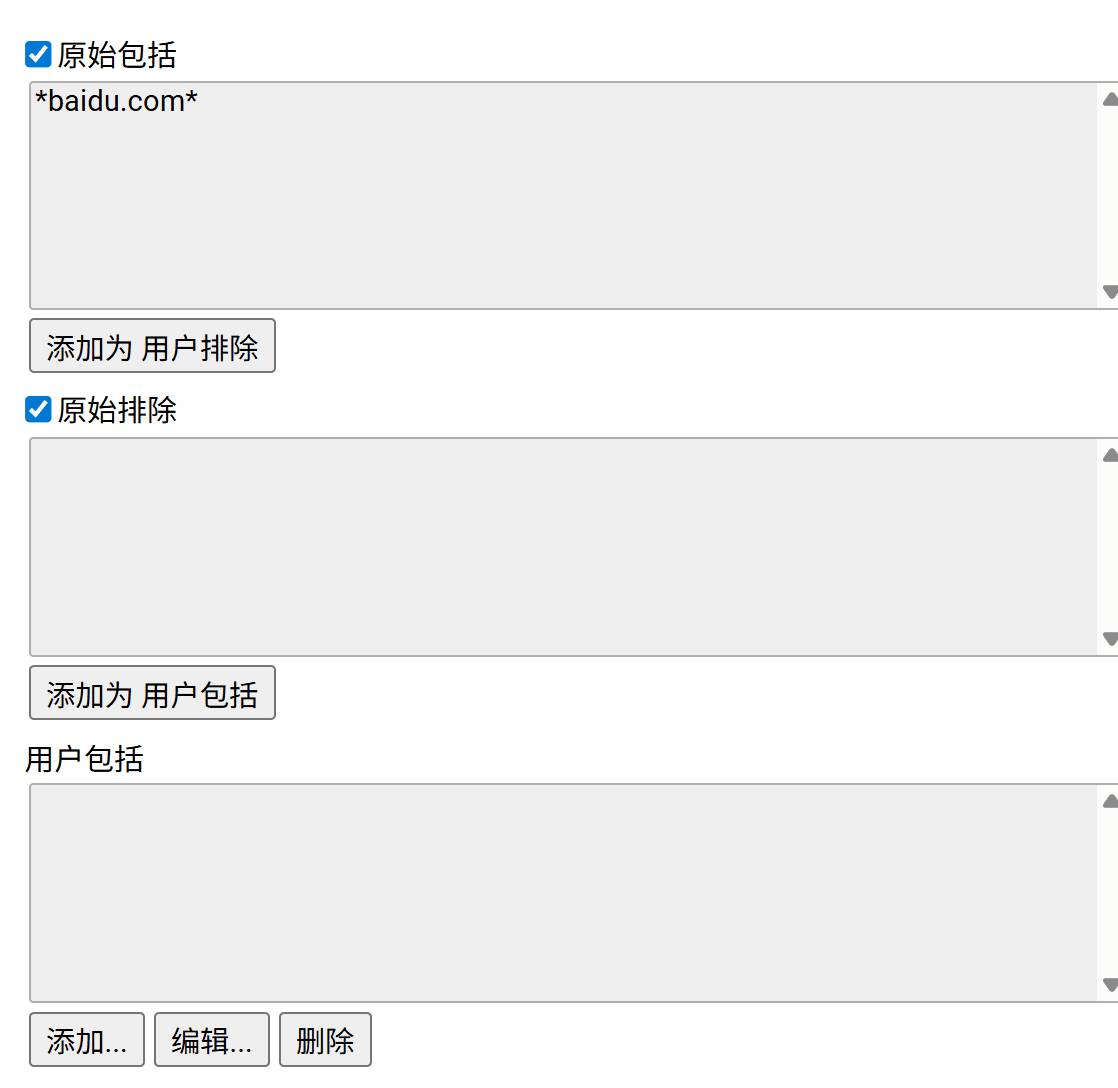
2.3.4 油猴设置面板分别对应字段
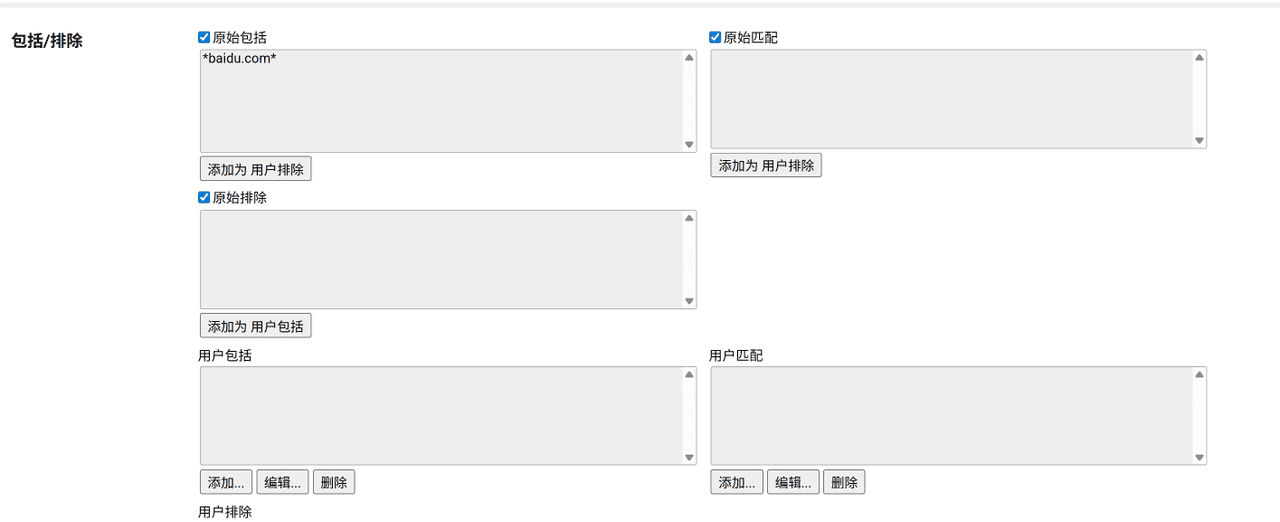
| 界面看到的文字 | 对应脚本头字段 | 备注 |
| 原始包括 | @include | 脚本代码里写的 include 规则 |
| 原始匹配 | @match | 脚本代码里写的 match 规则 |
| 原始排除 | @exclude | 脚本代码里写的 exclude 规则 |
| 用户包括 | 用户自定义 include | 在管理器界面手动添加,不会写进脚本文件 |
| 用户匹配 | 用户自定义 match | 同上 |
| 用户排除 | 用户自定义 exclude | 同上 |
注:“添加为用户排除 / 添加为用户包括”那几个按钮 = 把当前这条规则丢到“用户**”区域,方便不改代码就能临时屏蔽或放行。演示如下:
2.3.5 最佳实践速记
想“无脑通杀”、路径千变万化 → @include 最省事。想“精确到某几个子域、固定路径”、又要性能 → @match 更稳更快。可以混用:
// @match   *://github.com/*        // 精确主站
// @include *://*.github.io/*       // 用户页各种子域
// @exclude *://gist.github.com/*   // 但排除 gist
如果写 @match 报错,立刻看控制台,语法必循“分段”标准,例如*://*.example.com:*/path/* 任何一段乱写都会整行失效。
2.3.6 总结
@include/@exclude 像“模糊搜索”,写起来快、覆盖广;@match 像“身份证校验”,写得啰嗦但更快更严。根据场景混用即可:先用 @match 锁主战场,再用 @include 补边角,最后用 @exclude 踢掉不要的坑位。
2.4 跨域白名单
2.4.1 原理
油猴 2.x 以后,凡是用 GM_xmlhttpRequest 访问非“当前页面域名”的地址,都必须先在 @connect 里列白名单,否则会被拦截。(配置之后油猴会默认跨域)写法支持域名、IP、通配符 *、甚至 *://*.example.com:*。上面把脚本里可能请求的后端地址、本地开发地址都放行了。
// @connect      *https://www.baidu.com/ *
// @connect      127.0.0.1
// @connect      localhost
// @connect      192.168.124.xxx
2.4.2 设置面板对应的字段


2.5 能力清单
以 GM. 开头的是新版 Promise 化 API(TM 4.11+)。以 GM_ 开头的是旧版回调 API,两者可混用。unsafeWindow 表示要访问页面原始 window,绕过油猴的沙箱。window.close/focus/onurlchange 这类是脚本想直接操作窗口级事件。
// @grant        GM.addStyle
// @grant        GM.addValueChangeListener
// @grant        GM.cookie
// @grant        GM.deleteValue
// @grant        GM.deleteValues
// @grant        GM.download
// @grant        GM.getResourceText
// @grant        GM.getResourceUrl
// @grant        GM.getTab
// @grant        GM.getTabs
// @grant        GM.getValue
// @grant        GM.getValues
// @grant        GM.info
// @grant        GM.listValues
// @grant        GM.log
// @grant        GM.notification
// @grant        GM.openInTab
// @grant        GM.registerMenuCommand
// @grant        GM.removeValueChangeListener
// @grant        GM.saveTab
// @grant        GM.setClipboard
// @grant        GM.setValue
// @grant        GM.setValues
// @grant        GM.unregisterMenuCommand
// @grant        GM.webRequest
// @grant        GM.xmlHttpRequest
// @grant        GM_addElement
// @grant        GM_addStyle
// @grant        GM_addValueChangeListener
// @grant        GM_cookie
// @grant        GM_deleteValue
// @grant        GM_deleteValues
// @grant        GM_download
// @grant        GM_getResourceText
// @grant        GM_getResourceURL
// @grant        GM_getTab
// @grant        GM_getTabs
// @grant        GM_getValue
// @grant        GM_getValues
// @grant        GM_info
// @grant        GM_listValues
// @grant        GM_log
// @grant        GM_notification
// @grant        GM_openInTab
// @grant        GM_registerMenuCommand
// @grant        GM_removeValueChangeListener
// @grant        GM_saveTab
// @grant        GM_setClipboard
// @grant        GM_setValue
// @grant        GM_setValues
// @grant        GM_unregisterMenuCommand
// @grant        GM_webRequest
// @grant        GM_xmlhttpRequest
// @grant        unsafeWindow
// @grant        window.close
// @grant        window.focus
// @grant        window.onurlchange
// @grant        ……
注意:
没列在 @grant 里的 API 运行时会被拦截。如果一行 @grant 都不写,管理器默认开启“沙箱+自动注入”,但无法使用任何 GM_* 函数。写 // @grant none 表示“我不用任何特殊 API”,管理器会直接把脚本丢到页面上下文,性能最好,但也最不安全
2.6 总结
上面头部所描述的那么多,可以这么理解:其实是脚本的“户口本”:“我叫什么、版本多少、长什么样、在哪些网站上班、能喊哪些后台、会哪些超能力”——管理器针对这些行决定“给不给你发证,发什么证”。
第三章 搭建基础骨架
3.1 项目创建
下面是用脚手架搭建vue3项目的流程;需要注意的是:由于我们做的是插件项目,所以很多组件库其实是不需要添加的,就算最后有需求,先用原生,再考虑添加!所以我们只需要添加个项目名,其他路由、状态管理器、eslint等,都选择no就好
vue3基础+进阶(一、Vue3项目创建并相比vue2熟悉项目结构)
创建完成之后,为了方便,小编添加了一个移动端适配与element-plus组件如下:
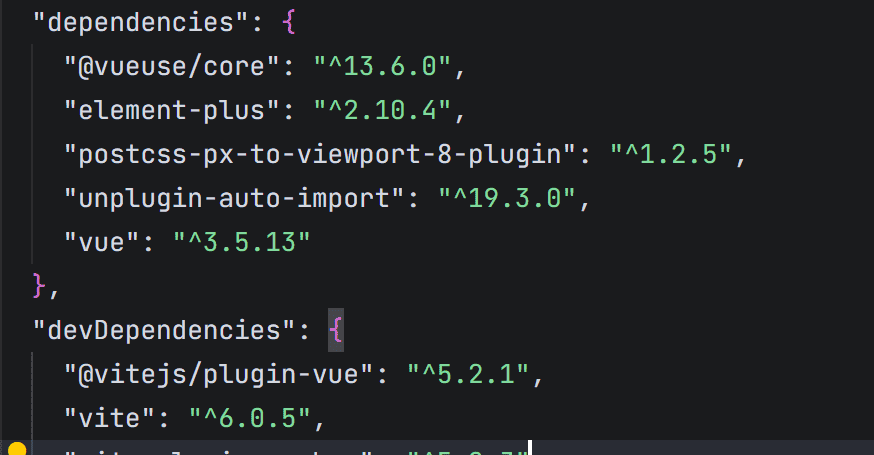
重中之重,决定是插件还是vue项目的插件库:vite-plugin-monkey
npm i -D vite-plugin-monkey目录规范(企业级):

3.2 油猴配置(meta.json)
将油猴的基本配置放在meta.json文件夹下统一添加:
{
    "name": "ve_test",
    "author": "VE",
    "description": "油猴插件脚本",
    "icon": "https://vitejs.dev/logo.svg",
    "namespace": "npm/vue3-template-plugin-pro",
    "include": [
        "*baidu.com*"
    ],
    "connect": [
        "*https://www.baidu.com/*",
        "127.0.0.1",
        "localhost"
    ],
    "version": "1.0.0",
    "grant": [
        "*"
    ]
}
添加完成后:
3.3 项目配置(vite.config.js)
上面操作完成之后vite.config.js 添加配置:
import { defineConfig } from 'vite'
import vue from '@vitejs/plugin-vue'
import monkeyPlugin from 'vite-plugin-monkey'
// 自动注入油猴头部配置
import userscriptConfig from './meta.json';

// 这里做一层处理的原因:有的需要动态配置可以在这里实现
const dynamicUserscriptConfig = {
    ...userscriptConfig
}

export default defineConfig({
  plugins: [
    vue(),
    monkeyPlugin({
      entry: 'src/main.js',
      userscript: dynamicUserscriptConfig,
      build: {
        autoGrant: true,
        fileName: `ve_test.user.js`,
        metaFileName: true
      }
    })
  ]
})
运行:
npm run dev        # 热更新
npm run build      # 生成 dist/index.user.js
3.4 数据持久化(GM_setValue与GM_getValue )
3.4.1 原理
GM_setValue 与 GM_getValue 是油猴脚本在“用户脚本沙箱”里存/取持久化数据的核心 API,相当于浏览器给每个脚本单独开了一小块 localStorage 增强版
3.4.2 使用方法
使用方法:
// 存
await GM.setValue(key, value)      // 新版 Promise 写法
GM_setValue(key, value)            // 旧版同步写法

// 取
let v = await GM.getValue(key)     // 新版
let v = GM_getValue(key [, defaultValue])  // 旧版
能存什么类型(一定要区分出localstore;因为小编下面很多代码都是按localstore,刚开始项目急,没有好好的看,走了很多弯路,如果大家有好的建议评论区提供!!)
字符串、数字、布尔、对象、数组、Date、Map、Set、ArrayBuffer、甚至 Blob 都能直接塞;底层自动走 JSON.stringify + structured clone,无需自己序列化;单条数据最大 ≈ 浏览器 IndexedDB 上限(理论 2 GB 级),远大于 localStorage 的 5 MB。
3.4.3 作用域与生命周期
按脚本隔离: 脚本 A 存的值,脚本 B 完全看不到,也不会跟页面本身的 localStorage 冲突。按浏览器轮廓持久: 清浏览器缓存、重启、升级脚本都不会丢,除非: 用户手动“重置脚本数据” 卸载脚本 手动删浏览器 IndexedDB 里的 tampermonkey 库同源不同页面共享: 同一脚本在 erp.xxx.com 和 crm.xxx.com 都能读到同一份数据。
3.4.4 用法示例
// 旧版同步写法(仍最常用)
// 记录上次折叠状态
GM_setValue('foldState', true);

// 下次进入页面读出来
const folded = GM_getValue('foldState', false);  // 没存过就返回 false
3.4.5 与 localStorage 的对比
| 特性 | GM_getValue / setValue | localStorage |
| 容量 | 大到 IndexedDB 上限 | 10 MB |
| 类型 | 任意 JS 结构化数据 | 仅字符串 |
| 作用域 | 同一脚本 | 当前域名下所有代码 |
| 跨域 | 脚本全域名共享 | 只能同源 |
| 用户清缓存 | 默认保留 | 容易被一起清掉 |
| 同步/异步 | 旧版同步,新版 Promise | 同步 |
3.4.6 注意事项
旧版 GM_setValue 是同步阻塞的,数据大时会卡主线程;新版 GM.setValue 返回 Promise,不堵页面。不要拿它当高速缓存疯狂写,IndexedDB 的写入事务太频繁也会降性能。如果脚本被卸载,管理器会提示“是否同时删除数据”,用户点“是”就全清空了——不要存不可恢复的唯一数据。想“跨脚本”共享,只能用 GM.setValue + GM.getValue 再包一层“约定 key 前缀”,或者干脆走后台服务器。
3.4.7 实战使用
这里小编是做了一层封装(因为小编很多地方都是用存储做的,包括多个页面的切换、用户登录等等,然后页面上监听存储的变化从而实现的);封装的思想就是先使用油猴自带的插件处理,如果没用则用localStorage存,每次存完了之后自定义事件用于组件响应式更新
/**
 * 存储工具函数 - 优先使用油猴GM_* API,其次回退到localStorage
 */

/**
 * 设置存储值
 * @param {string} key - 存储键名
 * @param {any} value - 存储值(支持对象,会自动JSON序列化)
 * @returns {boolean} - 是否设置成功
 */
export const storageSet = (key, value) => {
  try {
    // 优先使用油猴GM_setValue
    if (typeof GM_setValue === 'function') {
      // 对于对象类型,需要转换为字符串存储
      const storeValue = typeof value === 'object' ? JSON.stringify(value) : value;
      GM_setValue(key, storeValue);
      // 触发自定义事件,用于组件响应式更新
      window.dispatchEvent(new CustomEvent('localStorageChange', { detail: { key, value } }));
      return true;
    }
    // 回退到localStorage
    else if (typeof localStorage !== 'undefined') {
      const storeValue = typeof value === 'object' ? JSON.stringify(value) : value;
      localStorage.setItem(key, storeValue);
      // 触发自定义事件,用于组件响应式更新
      window.dispatchEvent(new CustomEvent('localStorageChange', { detail: { key, value } }));
      return true;
    }
  } catch (error) {
    console.error('存储设置失败:', error);
    return false;
  }
  return false;
}

/**
 * 获取存储值
 * @param {string} key - 存储键名
 * @param {any} defaultValue - 默认值(当获取失败或值不存在时返回)
 * @returns {any} - 存储值(对象会自动JSON解析)
 */
export const storageGet = (key, defaultValue = null) => {
  try {
    let value;
    // 优先使用油猴GM_getValue
    if (typeof GM_getValue === 'function') {
      value = GM_getValue(key);
    }
    // 回退到localStorage
    else if (typeof localStorage !== 'undefined') {
      value = localStorage.getItem(key);
    }

    // 如果值不存在,返回默认值
    if (value === undefined || value === null) {
      return defaultValue;
    }

    // 尝试解析JSON字符串
    try {
      return JSON.parse(value);
    } catch (e) {
      // 如果不是JSON字符串,直接返回原始值
      return value;
    }
  } catch (error) {
    console.error('存储获取失败:', error);
    return defaultValue;
  }
};

/**
 * 删除存储值
 * @param {string} key - 存储键名
 * @returns {boolean} - 是否删除成功
 */
export const storageDelete = (key, isClearEvent = false) => {
  try {
    // 优先使用油猴GM_deleteValue
    if (typeof GM_deleteValue === 'function') {
      GM_deleteValue(key);
      // 触发自定义事件,用于组件响应式更新
      isClearEvent && window.dispatchEvent(new CustomEvent('localStorageChange', { detail: { key, value: null } }));
      return true;
    }
    // 回退到localStorage
    else if (typeof localStorage !== 'undefined') {
      localStorage.removeItem(key);
      // 触发自定义事件,用于组件响应式更新
      isClearEvent && window.dispatchEvent(new CustomEvent('localStorageChange', { detail: { key, value: null } }));
      return true;
    }
  } catch (error) {
    console.error('存储删除失败:', error);
    return false;
  }
  return false;
}

/**
 * 清空所有存储值
 * @returns {boolean} - 是否清空成功
 */
export const storageClear = () => {
  try {
    // 油猴没有直接的清空方法,需要遍历所有键删除
    if (typeof GM_listValues === 'function' && typeof GM_deleteValue === 'function') {
      const keys = GM_listValues();
      keys.forEach(key => GM_deleteValue(key));
      // 触发自定义事件,用于组件响应式更新
      window.dispatchEvent(new CustomEvent('localStorageChange', { detail: { clear: true } }));
      return true;
    }
    // 回退到localStorage
    else if (typeof localStorage !== 'undefined') {
      localStorage.clear();
      // 触发自定义事件,用于组件响应式更新
      window.dispatchEvent(new CustomEvent('localStorageChange', { detail: { clear: true } }));
      return true;
    }
  } catch (error) {
    console.error('存储清空失败:', error);
    return false;
  }
  return false;
};
3.5 与后端联调:GM_xmlhttpRequest Promise 化
// utils/gm-request.js
export function gmx(opts) {
  return new Promise((resolve, reject) => {
    GM_xmlhttpRequest({
      method: opts.method || 'GET',
      url: opts.url,
      headers: opts.headers || {},
      data: opts.data,
      responseType: opts.responseType || 'json',
      onload: res => resolve(res),
      onerror: err => reject(err)
    })
  })
}
使用:
import { gmx } from '@/utils/gm-request.js'
const res = await gmx({
  url: 'https://erp.xxx.com/api/order/export',
  method: 'POST',
  headers: { Authorization: `Bearer ${user.token}` },
  data: { ids: selectedIds }
})
3.6 不同环境的运行方式
本地添加环境变量文件:
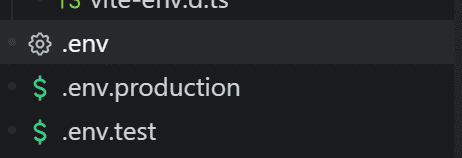
# 本地环境地址
VITE_BASE_URL = xxxx
# 测试环境地址
VITE_BASE_UR = xxx
# 生产环境地址
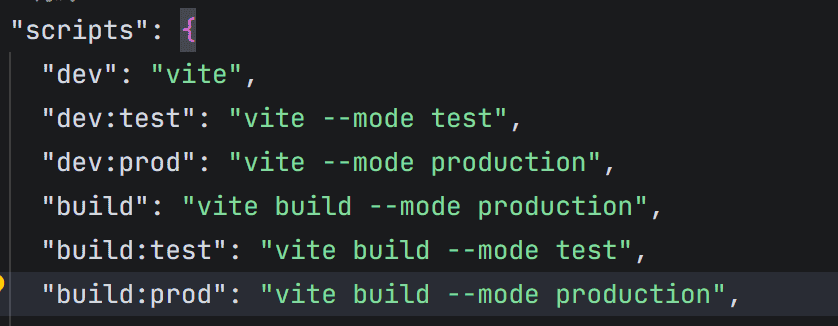
VITE_BASE_URL = xxxxpackage.json添加命令:
3.7 自动灰度更新(可选)
// App.vue
import { onMounted } from 'vue'

onMounted(() => {
  setInterval(async () => {
    const meta = await fetch(GM.info.scriptUpdateURL + '?t=' + Date.now())
      .then(r => r.text())
    const remoteVer = meta.match(/@versions+(d+.d+.d+)/)?.[1]
    if (remoteVer && remoteVer !== GM.info.script.version) {
      if (confirm(`发现新版本 ${remoteVer},立即更新?`)) {
        location.href = GM.info.script.downloadURL
      }
    }
  }, 1000 * 60 * 30)   // 30 min
})
3.8 审计 & 安全 checklist(提交前打 √):针对打包后的
[ ] 敏感配置全部走 GM_*Value,无硬编码[ ] 无 eval、new Function、innerHTML=用户输入[ ] @grant 与所用 GM_api 一一对应,不多不少[ ] 生产脚本 ≤ 100 KB(gzip)[ ] 版本号三段式,Tag 与 @version 同步
第四章 实战例子
小编在components中添加了一个组件:(除了使用vue3,其他基本上都是原生,包括js、css)

<template>
  <div class="home-index-container">
    <div class="header">
      <span class="title">插件面板</span>
      <div class="minimize-btn" @click.stop="handleMinimize">
        <el-icon><Minus /></el-icon>
      </div>
    </div>
    <div class="content">
      <el-button type="primary" @click.stop="handleClick">测试按钮</el-button>
    </div>
  </div>
</template>
<script setup>
import { ElMessageBox, ElMessage } from "element-plus";
const emit = defineEmits(["close"]);

const handleMinimize = () => {
  emit("close");
};

const handleClick = () => {
  ElMessageBox.confirm("确认框测试?")
    .then(() => {
      ElMessage.success("提示测试");
    })
    .catch(() => {});
};
</script>
<style scoped>
.home-index-container {
  position: relative;
  width: 320px;
  min-height: 180px;
  display: flex;
  flex-direction: column;
  background-color: #fff;
  border-radius: 8px;
  overflow: hidden;
}

.header {
  display: flex;
  align-items: center;
  justify-content: space-between;
  padding: 12px 16px;
  border-bottom: 1px solid #ebeef5;
  background-color: #f5f7fa;
}

.title {
  font-size: 14px;
  font-weight: 600;
  color: #303133;
}

.minimize-btn {
  cursor: pointer;
  display: flex;
  align-items: center;
  justify-content: center;
  width: 24px;
  height: 24px;
  border-radius: 4px;
  transition: background-color 0.2s;
  color: #909399;
}

.minimize-btn:hover {
  background-color: rgba(0, 0, 0, 0.05);
  color: #606266;
}

.content {
  flex: 1;
  display: flex;
  flex-direction: column;
  align-items: center;
  justify-content: center;
  padding: 24px;
  gap: 12px;
}

.desc {
  font-size: 12px;
  color: #909399;
}
</style>
App引入组件:
<script setup>
import rightIcon from "./assets/imgs/right-icon.png";
import { useDraggable } from "@vueuse/core";
import { useTemplateRef, ref } from "vue";
import HomeIndex from "./components/HomeIndex.vue";

const mainBox = useTemplateRef("main_box");
const isDragged = ref(false);
const { x, y, style } = useDraggable(mainBox, {
  preventDefault: true,
  initialValue: { x: 140, y: 140 },
  onStart: () => {
    isDragged.value = false;
  },
  onMove: () => {
    isDragged.value = true;
  },
  onEnd: () => {
    setTimeout(() => {
      isDragged.value = false;
    }, 0);
  },
});

const loading = ref(false);
const showSimple = ref(false);
const showMinBox = ref(true);

const showMax = () => {
  showSimple.value = true;
  showMinBox.value = false;
};

const showMin = () => {
  showSimple.value = false;
  showMinBox.value = true;
};
</script>

<template>
  <div v-show="!showMinBox">
    <div
      ref="main_box"
      :style="style"
      class="mian-modal"
      v-loading="loading"
      element-loading-text="加载中..."
      v-if="showSimple"
    >
      <HomeIndex @close="showMin"></HomeIndex>
    </div>
  </div>
  <div
    class="min-box"
    v-show="showMinBox"
    :style="{ backgroundImage: `url(${rightIcon})` }"
    @click="showMax"
  >
    <el-icon color="#2878FF"><ArrowLeft /></el-icon>
  </div>
</template>

<style scoped>
.mian-modal {
  position: fixed;
  background: #ffffff;
  box-shadow: 0px 8px 22px 7px rgba(191, 191, 191, 0.24);
  border-radius: 8px;
  z-index: 100;
  text-align: left;
}
.min-box {
  position: fixed;
  display: flex;
  align-items: center;
  justify-content: center;
  width: 22px;
  height: 72px;
  right: -5px;
  top: 50%;
  transform: translateY(-50%);
  z-index: 100;
  background-size: cover;
  background-repeat: no-repeat;
  cursor: pointer;
}
</style>
自此,一插件的基本流程就完成了,跟着上面的流程走,针对绝大部分插件都能实现
第五章 源代码地址
https://gitee.com/shallow-winds/vue3-template-plugin-pro
© 版权声明
文章版权归作者所有,未经允许请勿转载。
相关文章


暂无评论...