目录
一、VScode 安装
1、简介
2、下载安装
二、创建第一个vue 项目
1、Vue简介
2、1 安装node
三、一个简单的demo
一、VScode 安装
1、简介
Visual Studio Code(简称 VS Code)是一个由微软开发,同时支持 Windows 、 Linux 和 macOS 等操作系统且开放源代码的代码编辑器,编辑器中内置了扩展程序管理的功能。免费。
2、下载安装
下载地址:https://code.visualstudio.com/docs/?dv=win64user


安装方法
一路next
二、创建第一个vue 项目
1、Vue简介
什么是vue?
Vue 是一种流行的前端 JavaScript 框架,用于构建用户界面和单页面应用(SPA)。它由尤雨溪(Evan You)于 2014 年创建,现由国际社区和核心团队共同维护。
Vue 的最新稳定版本是 Vue 3(2020年发布),引入了 Composition API、性能优化等新特性。与 React、Angular 相比,Vue 以学习曲线平缓、文档友好著称,适合初学者和快速迭代项目。
环境准备
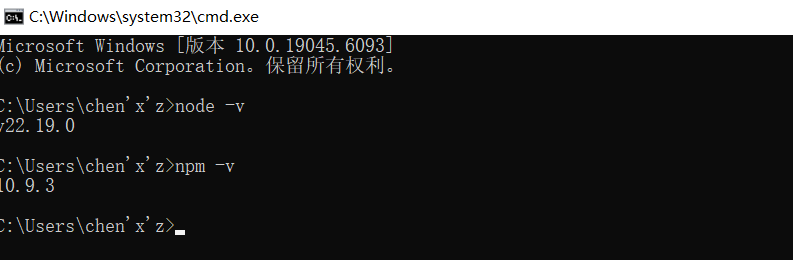
2、1 安装node
(1)检查node 是否已经安装
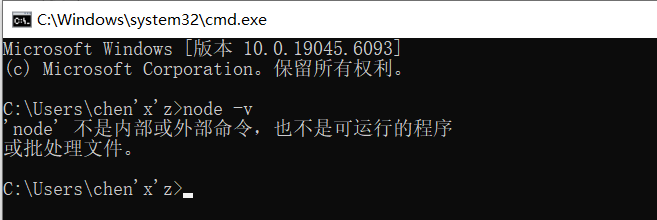
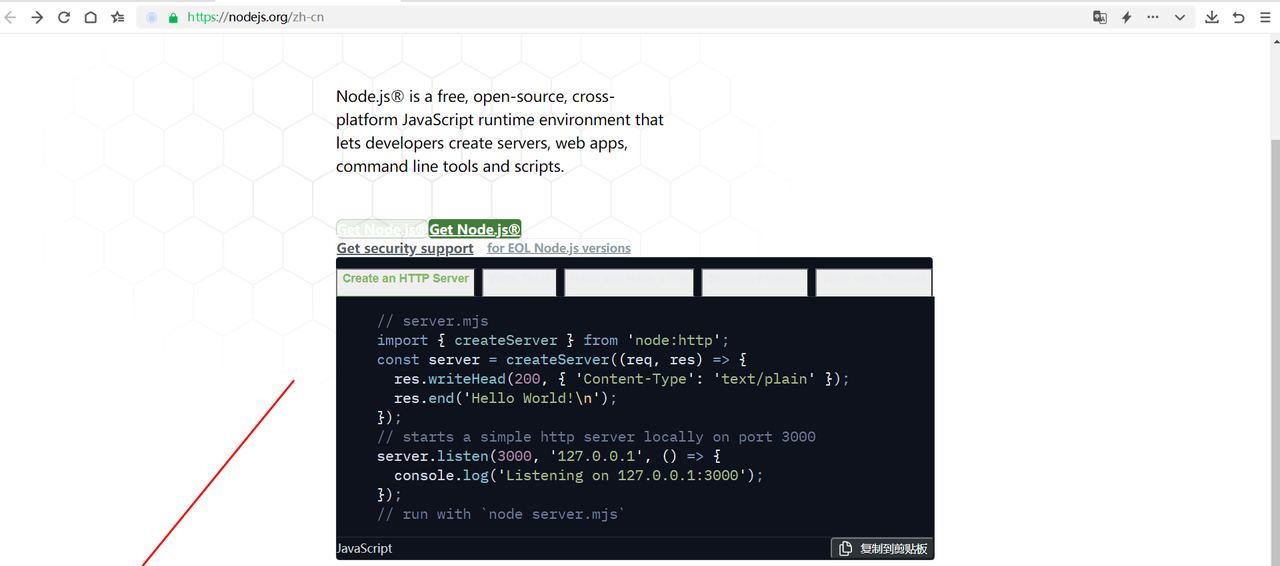
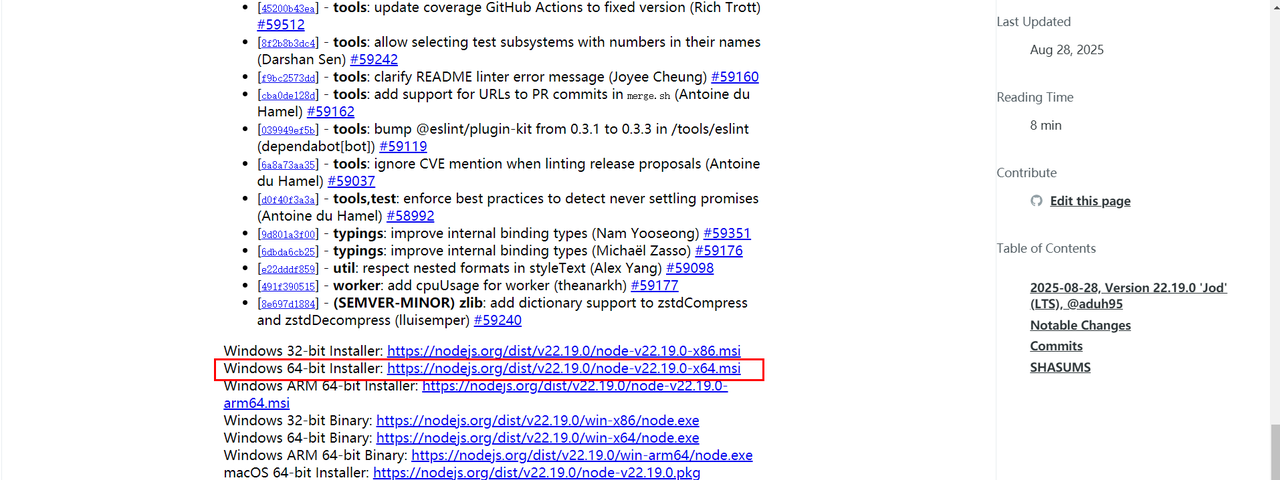
(2)下载node
访问官网:https://nodejs.org
(3)安装:一路next 就可以。
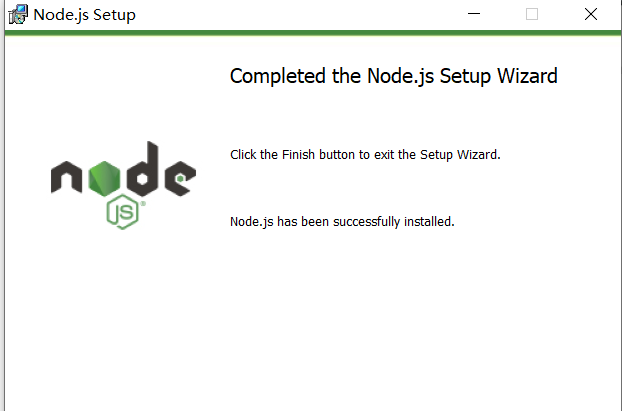
验证是否安装成功
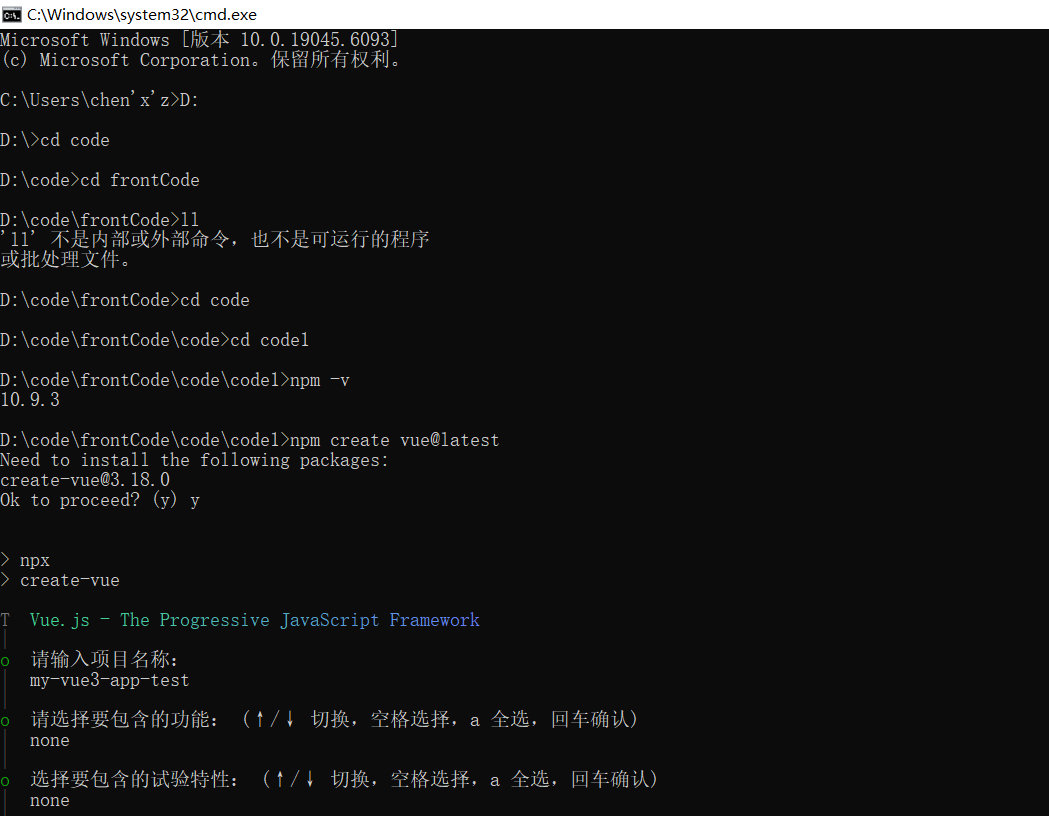
创建vue 项目
打开终端或命令提示符,输入以下命令:


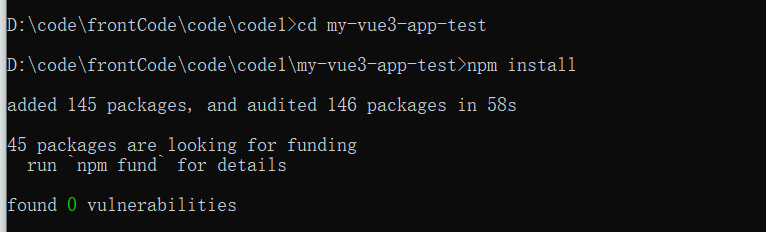
4、安装项目依赖
5、启动项目
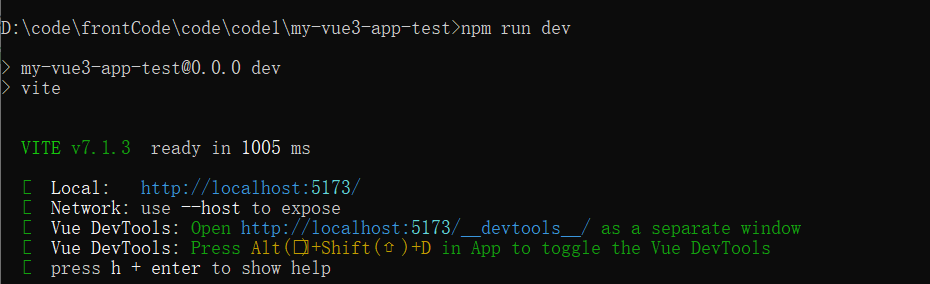
按下 Ctrl+C 可以停止项目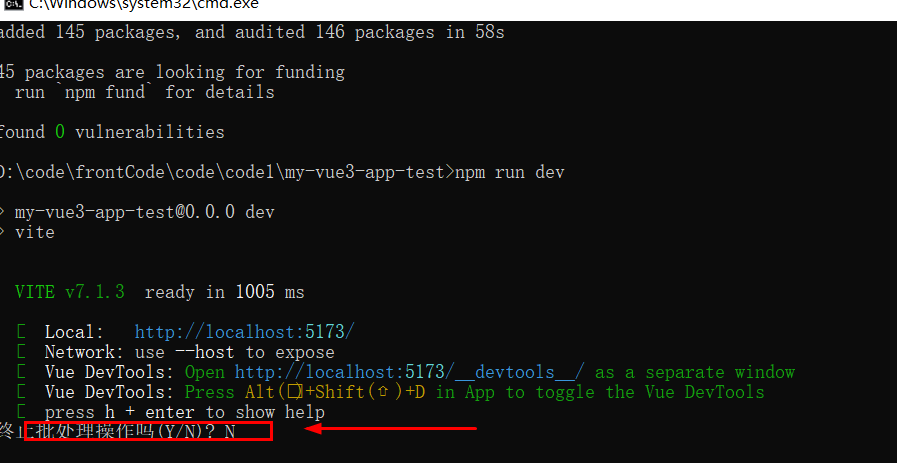
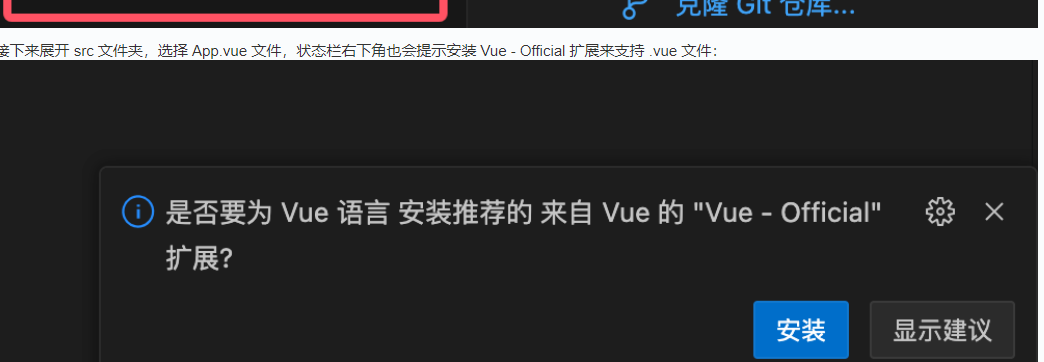
使用vscode 打开项目

三、一个简单的demo
描述:
创建一个页面,访问后端接口/user/getUsers,接受后端返回的用户信息list,并列出来。
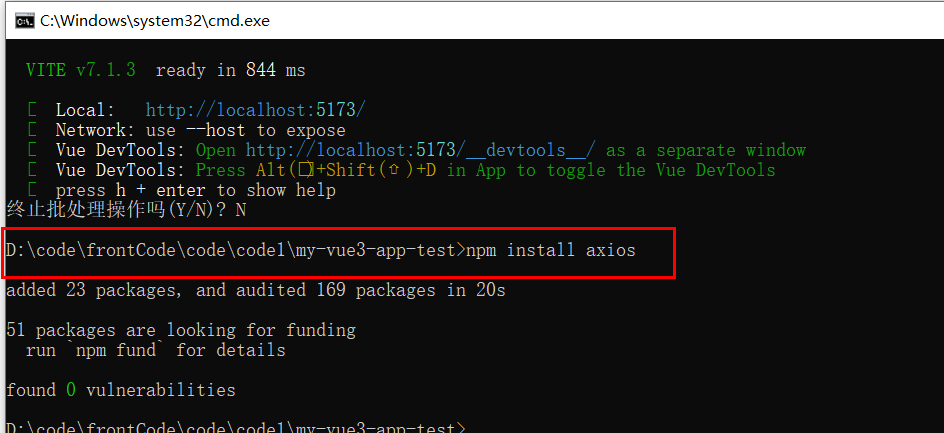
安装 Axios
创建页面组件
我们将创建一个名为 UserList.vue 的组件。
在 src/components/ 目录下,新建一个文件,命名为 UserList.vue。
将以下代码复制到该文件中:
<template>

  <div class="user-list">

    <h1>用户列表</h1>

    <!-- 加载状态 -->

    <p v-if="loading">加载中...</p>

    <!-- 错误状态 -->

    <p v-else-if="error" class="error">出错啦:{{ error }}</p>

    <!-- 空状态 -->

    <p v-else-if="!users || users.length === 0">暂无用户数据</p>

    <!-- 正常渲染数据 -->

    <ul v-else class="user-container">

      <li v-for="user in users" :key="user.id" class="user-card">

        <!-- 根据你的实际接口字段进行调整 -->

        <p><strong>ID:</strong> {{ user.id }}</p>

        <p><strong>用户名:</strong> {{ user.username || user.name }}</p>

        <p><strong>邮箱:</strong> {{ user.email }}</p>

        <!-- 可以继续添加其他字段,如年龄、电话等 -->

      </li>

    </ul>

  </div>

</template>


<script>

// 1. 导入 axios

import axios from 'axios';


export default {

  name: 'UserList',

  data() {

    return {

      users: [], // 用于存储用户列表数据

      loading: false, // 加载状态

      error: null // 错误信息

    };

  },

  // 2. 在组件挂载后自动获取数据

  mounted() {

    this.fetchUsers();

  },

  methods: {

    async fetchUsers() {

      // 3. 开始请求,设置 loading 为 true,清空错误信息

      this.loading = true;

      this.error = null;


      try {

        // 4. 发送 GET 请求到后端 API

        // 请将 '/api/user/getUsers' 替换为你实际的后端接口地址

        const response = await axios.get('/api/user/getUsers');


        // 5. 请求成功,将返回的数据赋值给 users

        // 假设后端返回的数据结构是 { data: { list: [...] } } 或直接是数组 [...]

        // 你需要根据你后端返回的实际数据结构来调整

        this.users = response.data.list || response.data;

      } catch (err) {

        // 6. 请求失败,捕获错误

        console.error('获取用户数据失败:', err);

        this.error = err.message || '请求失败,请稍后重试';

      } finally {

        // 7. 无论成功失败,都结束 loading 状态

        this.loading = false;

      }

    }

  }

};

</script>


<style scoped>

.user-list {

  padding: 20px;

  max-width: 800px;

  margin: 0 auto;

}


h1 {

  color: #2c3e50;

  text-align: center;

  margin-bottom: 20px;

}


.error {

  color: #ff5252;

  text-align: center;

  font-weight: bold;

}


.user-container {

  list-style: none;

  padding: 0;

  display: grid;

  grid-template-columns: repeat(auto-fill, minmax(250px, 1fr));

  gap: 20px;

}


.user-card {

  background-color: #f9f9f9;

  border: 1px solid #e0e0e0;

  border-radius: 8px;

  padding: 15px;

  box-shadow: 0 2px 4px rgba(0, 0, 0, 0.1);

}


.user-card:hover {

  box-shadow: 0 4px 8px rgba(0, 0, 0, 0.15);

  transform: translateY(-2px);

  transition: all 0.2s ease;

}


.user-card p {

  margin: 5px 0;

}

</style>
重要提示:关于接口地址
代码中使用的请求地址是 '/api/user/getUsers'。如果你的后端就在本地开发(例如使用 Spring Boot 运行在 http://localhost:8080),你会遇到跨域问题。
解决方法:配置 Vite 代理。
打开项目根目录下的 vite.config.js 文件。
添加以下配置:
import { defineConfig } from 'vite'

import vue from '@vitejs/plugin-vue'


// https://vitejs.dev/config/

export default defineConfig({

  plugins: [vue()],

  server: {

    proxy: {

      // 字符串简写写法

      '/api': {

        target: 'http://localhost:8080', // 你的后端服务器地址

        changeOrigin: true,

        rewrite: (path) => path.replace(/^/api/, '') // 可选的,重写路径,去掉 /api 前缀

      }

    }

  }

})
这样配置后,你在前端请求 /api/user/getUsers,Vite 开发服务器会自动将其代理到 http://localhost:8080/user/getUsers,从而解决跨域问题。
记得根据你的后端实际地址修改 target。
第三步:在 App.vue 中使用这个组件
现在,我们需要在主组件 App.vue 中引入并使用我们刚刚创建的 UserList 组件。
打开 src/App.vue 文件,将其内容替换为以下代码:
<template>

  <div id="app">

    <!-- 使用用户列表组件 -->

    <UserList />

  </div>

</template>


<script>

// 1. 导入组件

import UserList from './components/UserList.vue'


export default {

  name: 'App',

  // 2. 注册组件

  components: {

    UserList

  }

}

</script>


<style>

/* 可以添加一些全局样式 */

#app {

  font-family: Avenir, Helvetica, Arial, sans-serif;

  -webkit-font-smoothing: antialiased;

  -moz-osx-font-smoothing: grayscale;

  color: #2c3e50;

}

</style>
第四步:查看效果
确保你的开发服务器正在运行(如果没运行,在终端输入 npm run dev)。
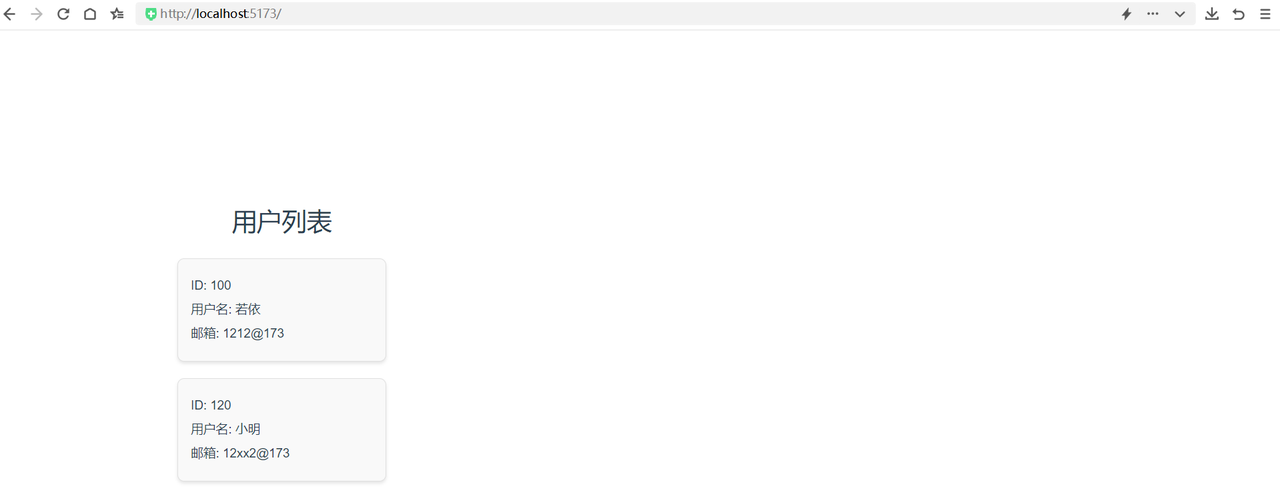
打开浏览器访问 http://localhost:5173。
如果你的后端接口 http://localhost:8080/user/getUsers 是通的,并且返回了正确的 JSON 数据(例如 [{“id”: 1, “name”: “John”, “email”: “john@example.com”}]),你现在应该能看到用户列表漂亮地展示出来了!
后端接口数据结构示例
为了让前端正确解析,你的后端接口返回的 JSON 数据格式应该是这样的(两种常见格式之一):
格式一(直接返回数组):
json
复制
下载
[
{ “id”: 1, “username”: “张三”, “email”: “zhangsan@example.com” },
{ “id”: 2, “username”: “李四”, “email”: “lisi@example.com” }]
格式二(返回一个包装对象):
json
复制
下载
{
“code”: 200,
“message”: “成功”,
“data”: {
“list”: [
{ “id”: 1, “username”: “张三”, “email”: “zhangsan@example.com” },
{ “id”: 2, “username”: “李四”, “email”: “lisi@example.com” }
]
}}
如果使用格式二,你需要修改 UserList.vue 中的代码:
javascript
复制
下载
this.users = response.data.data.list; // 根据你的实际结构逐层获取// 或者如果结构是 { code, message, list }// this.users = response.data.list;
现在,你已经成功创建了一个可以交互的动态页面!
© 版权声明
文章版权归作者所有,未经允许请勿转载。
相关文章


暂无评论...