12345678910
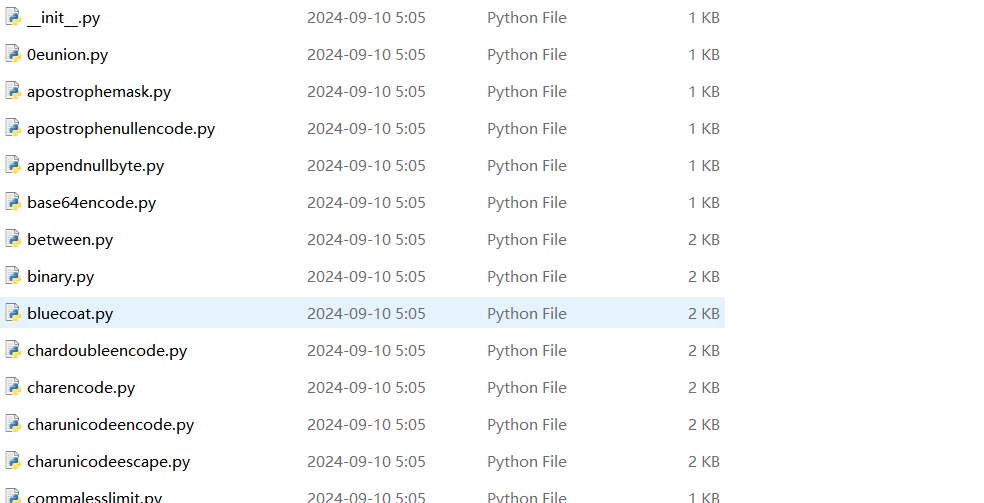
Stage应用模型
1.Stage模型基本概念
应用模型是系统为开发者提供的应用程序所需能力的抽象提炼,它提供了应用程序必备的组件和运行机制。简而言之,应用模型就是像是应用的施工图纸,他规范化了程序运行流程、项目结构、文件功能等……
随着系统的演进发展,先后提供了两种应用模型:
FA 模型:从API7开始支持的模型,已经不再主推Stage 模型:从API9开始新增的模型,是目前主推且会长期演进的模型。
2. Stage模型配置文件
当我们创建一个State模型的项目时,项目的目录结构如下图所示。目录结构规定各种文件资源应在存放在哪些位置、以及应用程序的相关配置应该在哪个文件中编写等。

每个应用项目的代码目录下必须包含应用配置文件,这些配置文件会向编译工具、操作系统和应用市场提供应用的基本信息。
在基于Stage模型开发的应用项目代码下,都存在一个app.json5配置文件、以及一个或多个module.json5配置文件。
● app.json5配置文件:用于声明应用的全局配置信息,比如应用Bundle名称、应用名称、应用图标、应用版本号等
● module.json5配置文件:用于声明Module基本信息、支持的设备类型、所含的组件信息、运行所需申请的权限等。
2.1 app.json5 配置文件
{ "app": { "bundleName": "com.example.mytargetmanagement", //应用包名 "vendor": "example", //表示对应用厂商的描述 "versionCode": 1000000, //应用程序版本号 "versionName": "1.0.0", //应用程序版本名称 "icon": "$media:app_icon", //应用程序图标 "label": "$string:app_name" //应用程序名称 } }bash12345678910
2.2 model.json5 配置文件
{ "module": { "name": "entry", //模块名称 "type": "entry", //模块类型(entry:应用的主模块、feature:应用的动态特性模块) "description": "$string:module_desc", //模块描述 "mainElement": "EntryAbility", //标识当前Module的入口UIAbility "deviceTypes": [ //设备类型 "phone", "tablet", "2in1" ], "deliveryWithInstall": true, "installationFree": false, "pages": "$profile:main_pages", "abilities": [ { "name": "EntryAbility", "srcEntry": "./ets/entryability/EntryAbility.ets", "description": "$string:EntryAbility_desc", "icon": "$media:layered_image", "label": "$string:EntryAbility_label", "startWindowIcon": "$media:startIcon", "startWindowBackground": "$color:start_window_background", "exported": true, "skills": [ { "entities": [ "entity.system.home" ], "actions": [ "action.system.home" ] } ] } ], "extensionAbilities": [ { "name": "EntryBackupAbility", "srcEntry": "./ets/entrybackupability/EntryBackupAbility.ets", "type": "backup", "exported": false, "metadata": [ { "name": "ohos.extension.backup", "resource": "$profile:backup_config" } ], } ] } }bash
3.State模型UIAbility
3.1 UIAbility组件概述
UIAbility是一种包含用户界面的应用组件,主要用于和用户进行交互。每一个UIAbility实例,都对应于一个最近任务列表中的任务;一个应用可以有一个 UIAbility 也可以有多个 UIAbility

3.2 创建UIAbility并指定启动页面
应用中的UIAbility在启动过程中,需要指定启动页面,否则应用启动后会因为没有默认加载页面而导致白屏。可以在UIAbility的onWindowStageCreate()生命周期回调中,通过WindowStage对象的loadContent()方法设置启动页面。
import { UIAbility } from '@kit.AbilityKit'; import { window } from '@kit.ArkUI'; export default class EntryAbility extends UIAbility { onWindowStageCreate(windowStage: window.WindowStage): void { windowStage.loadContent('pages/Index', (err, data) => { // ... }); } // ... }bash
说明:
在DevEco Studio中创建的UIAbility中,该UIAbility实例默认会加载Index页面,根据需要将Index页面路径替换为需要的页面路径即可。
3.3 启动UIAbility组件并传递参数
UIAbility是系统调度的最小单元。在设备内的功能模块之间跳转时,会涉及到启动特定的UIAbility,包括应用内的其他UIAbility、或者其他应用的UIAbility(例如启动三方支付UIAbility)。我们这里以启动应用内的Ability为例。
假设现在有如下需求
● 有两个Ability,分别是EntryAbility和SecondAbility,EntryAbility只有Page1页面,而SecondAbility中有Page2和Page3页面;EntryAbility作为默认的Ability。
● 启动EntryAbility时加载Page1页面,启动SecondAbility时加载Page2页面
● 在Page1页面中点击按钮时跳转到SecondAbility
● 在Page2页面中点击按钮跳转到Page3页面(Page2和Page3都属于SecondAbility)
下面是需求示意图

指定EntryAbility的启动页Page1
 指定SecondAbility的启动页Page2
 接下来在Page1页面中启动SecondAbility,启动UIAbility只需要2步就可以了
获取应用上下文对象:context = getContext(this) as common.UIAbilityContext;通过上下文对象启动指定的Ability:context.startAbility(Want);目标Ability通过Want参数来指定
import Want from '@ohos.app.ability.Want' import { common } from '@kit.AbilityKit'; import { BusinessError } from '@kit.BasicServicesKit'; @Entry @Component struct Page1 { //1.获取应用上下文 private context = getContext(this) as common.UIAbilityContext; @State info:string = '窗前明月光' build() { Column({ space: 10 }) { Text('Page1').fontSize(50).fontWeight(FontWeight.Bold) Text(`这是Page1的数据:${this.info}`) Button('跳转到SecondAbility').onClick(() => { //2.创建目标意图对象,并启动目标Ability let wantInfo: Want = { deviceId: '', bundleName: 'com.yutianedu.myapplication', moduleName: 'entry', abilityName: 'SecondAbility', parameters: { info: this.info } } this.context.startAbility(wantInfo).then(() => { console.log('SecondAbility启动成功') }).catch((error: BusinessError) => { console.log('SecondAbility启动失败') }); }) } .height('100%') .width('100%') .justifyContent(FlexAlign.Center) } }bash
在SecondAbility中接收来自Page1的参数
export default class SecondAbility extends UIAbility {
  onCreate(want: Want, launchParam: AbilityConstant.LaunchParam): void {
    hilog.info(0x0000, 'testTag', '%{public}s', 'Ability onCreate');
    //获取来自Page1的数据
    let info = want?.parameters?.info as string
    console.log(`来自Page1的数据:${info}`)
  }
}

bash
12345678
3.4 UIAbility生命周期
当用户打开、切换和返回到对应应用时,应用中的UIAbility实例会在其生命周期的不同状态之间转换。UIAbility的生命周期包括Create、Foreground、Background、Destroy四个状态,如下图所示。

完整生命周期如下

在DevEco Studio 中创建EntryAbiltiy时默认就帮我们写好几个生命周期函数,代码如下
import { AbilityConstant, UIAbility, Want } from '@kit.AbilityKit'; import { hilog } from '@kit.PerformanceAnalysisKit'; import { window } from '@kit.ArkUI'; export default class EntryAbility extends UIAbility { //1.Create状态为在应用加载过程中,UIAbility实例创建完成时触发,系统会调用onCreate()回调。可以在该回调中进行页面初始化操作,例如变量定义资源加载等,用于后续的UI展示。 onCreate(want: Want, launchParam: AbilityConstant.LaunchParam): void { hilog.info(0x0000, 'EntryAbility', '%{public}s', 'Ability onCreate'); } //2.UIAbility实例创建完成之后,在进入Foreground之前,系统会创建一个WindowStage。WindowStage创建完成后会进入onWindowStageCreate()回调,可以在该回调中设置UI加载 onWindowStageCreate(windowStage: window.WindowStage): void { //再次指定该UIAbility启动页面 windowStage.loadContent("pages/Page1",(err)=>{ if (err.code) { hilog.error(0x0000, 'EntryAbility', 'Failed to load the content. Cause: %{public}s', JSON.stringify(err) ?? ''); return; } hilog.info(0x0000, 'EntryAbility', 'Succeeded in loading the content.'); }) } //3.Ability转台前台时触发 onForeground(): void { // Ability has brought to foreground hilog.info(0x0000, 'EntryAbility', '%{public}s', 'Ability onForeground'); } //4.Ability转台后台时触发 onBackground(): void { // Ability has back to background hilog.info(0x0000, 'EntryAbility', '%{public}s', 'Ability onBackground'); } //5.Ability销毁时触发,用于执行一些清理资源操作 onDestroy(): void { hilog.info(0x0000, 'EntryAbility', '%{public}s', 'Ability onDestroy'); } }bash
4.LocalStorage页面级UI状态存储
如果一个UIAbility中有多个Page页,想要实现UIAbility内Page页面间的数据共享,可以使用LocalStorage来实现, LocalStorage是页面级的UI状态存储。
具体步骤如下:
在UIAbility中创建LocalStorage对象,并存储数据在Page页中获取LocalStorage对象,并从中获取数据
下面是UIAbility内Page页面间的数据共享的示意图

4.1 LocalStorage存储数据
接上面的案例,在SecondAbiltiy中将接收来自EntryAbility的数据赋值给info,然后将info数据存储到LocalStorage中,并加LocalStorage传递给Page2页面。
import { AbilityConstant, UIAbility, Want } from '@kit.AbilityKit'; import { hilog } from '@kit.PerformanceAnalysisKit'; import { window } from '@kit.ArkUI'; export default class SecondAbility extends UIAbility { //1.创建LocalStroage本地存储对象 private storage: LocalStorage = new LocalStorage() onCreate(want: Want, launchParam: AbilityConstant.LaunchParam): void { //获取来自Page1的数据 let info = want?.parameters?.info as string console.log(`来自Page1的数据:${info}`) //2. 将info数据存储到LocalStroage中 this.storage.setOrCreate('PropA', info) this.storage.setOrCreate('PropB', info) } onDestroy(): void { hilog.info(0x0000, 'testTag', '%{public}s', 'Ability onDestroy'); } onWindowStageCreate(windowStage: window.WindowStage): void { // Main window is created, set main page for this ability hilog.info(0x0000, 'testTag', '%{public}s', 'Ability onWindowStageCreate'); windowStage.loadContent('pages/Page2', this.storage, (err) => { if (err.code) { hilog.error(0x0000, 'testTag', 'Failed to load the content. Cause: %{public}s', JSON.stringify(err) ?? ''); return; } hilog.info(0x0000, 'testTag', 'Succeeded in loading the content.'); }); } //... }bash
4.2 LocalStorage获取数据
在Page2中获取LocalStorage数据
import { router } from '@kit.ArkUI'; //1. 通过getShared接口获取stage共享的LocalStorage实例 let storage = LocalStorage.getShared() //2. 将LocalStorage对象传递个页面 @Entry(storage) @Component struct Page2 { //3. 从LocalStroage中获取PropA键对应的值 @LocalStorageLink('PropA') propA: string = '' build() { Column({ space: 10 }) { Text('Page2').fontSize(50).fontWeight(FontWeight.Bold) Text(`来自SecondAbility的数据:${this.propA}`) Button('跳转到Page3').onClick(() => { router.pushUrl({ url: 'pages/Page3' }) }) } .height('100%') .width('100%') .justifyContent(FlexAlign.Center) } }bash
在Page3中获取LocalStorage数据
import { router } from '@kit.ArkUI' //1.获取LocalStorage存储对象 let storage: LocalStorage = LocalStorage.getShared() //2.将LocalStorage对象传递给页面 @Entry(storage) @Component struct Page3 { //3.从LocalStorage对象中获取数据 @LocalStorageLink('PropA') propA: string = '' build() { Column({ space: 10 }) { Text('Page3').fontSize(50).fontWeight(FontWeight.Bold) Text(`来自SecondAbility的数据:${this.propA}`) Button('返回到Page2').onClick(() => { router.back() }) } .height('100%') .width('100%') .justifyContent(FlexAlign.Center) } }bash
4.3 LocalStorage状态管理
LocalStorage根据与@Component装饰的组件的同步类型不同,提供了两个装饰器:
● @LocalStorageProp:@LocalStorageProp装饰的变量与LocalStorage中给定属性建立单向同步关系。
● @LocalStorageLink:@LocalStorageLink装饰的变量与LocalStorage中给定属性建立双向同步关系。

@LocalStorageProp单向同步特点
@LocalStorageLink(key)装饰的变量改变时,其变化不会同步回LocalStorage对应key的属性中。LocalStorage(key)中值的变化会引发所有被@LocalStorageProp对应key装饰的变量的变化,会覆盖@LocalStorageProp本地的改变。
import { router } from '@kit.ArkUI'; //1. 通过getShared接口获取stage共享的LocalStorage实例 let storage = LocalStorage.getShared() //2. 将LocalStorage对象传递个页面 @Entry(storage) @Component struct Page2 { //3. 从LocalStroage中获取PropA键对应的值 @LocalStorageProp('PropA') propA: string = '' build() { Column({ space: 10 }) { Text('Page2').fontSize(50).fontWeight(FontWeight.Bold) Text(`来自SecondAbility的数据:${this.propA}`) Button('跳转到Page3').onClick(() => { router.pushUrl({ url: 'pages/Page3' }) }) Button('点击修改数据').onClick(()=>{ this.propA = '疑是地上霜' //storage.set('PropA','疑是地上霜') }) } .height('100%') .width('100%') .justifyContent(FlexAlign.Center) } }bash
@LocalStorageProp双向同步特点
@LocalStorageLink(key)装饰的变量改变时,其变化将被同步回LocalStorage对应key的属性中。LocalStorage中属性键值key对应的数据一旦改变,属性键值key绑定的所有的数据(包括双向@LocalStorageLink和单向@LocalStorageProp)都将同步修改。
import { router } from '@kit.ArkUI'; //1. 通过getShared接口获取stage共享的LocalStorage实例 let storage = LocalStorage.getShared() //2. 将LocalStorage对象传递个页面 @Entry(storage) @Component struct Page2 { //3. 从LocalStroage中获取PropA键对应的值 @LocalStorageLink('PropA') propA: string = '' build() { Column({ space: 10 }) { Text('Page2').fontSize(50).fontWeight(FontWeight.Bold) Text(`来自SecondAbility的数据:${this.propA}`) Button('跳转到Page3').onClick(() => { router.pushUrl({ url: 'pages/Page3' }) }) Button('点击修改数据').onClick(()=>{ this.propA = '疑是地上霜' //storage.set('PropA','疑是地上霜') }) } .height('100%') .width('100%') .justifyContent(FlexAlign.Center) } }bash
5.AppStorage 应用级UI状态存储
AppStorage是应用全局的UI状态存储,是和应用的进程绑定的,由UI框架在应用程序启动时创建,为应用程序UI状态属性提供中央存储。
和LocalStorage不同的是,LocalStorage是页面级的,通常应用于页面内的数据共享;而AppStorage是应用级的全局状态共享,还相当于整个应用的“中枢”。
AppStorage可以在应用的多个UIAbility中共享数据,如下图所示

5.1 AppStorage存储数据
在Page1中存储数据到AppStorage,并从AppStorage中获取数据与propA建立单向同步关系,与propB建立双向同步关系。
import { common, Want } from '@kit.AbilityKit' @Entry @Component struct Page1 { private context = getContext(this) as common.UIAbilityContext @StorageProp('PropA') propA: string = '' //与AppStorage单向同步数据 @StorageLink('PropB') propB: string = '' //与AppStorage双向同步数据 aboutToAppear(): void { AppStorage .setOrCreate('PropA','窗前明月光') AppStorage .setOrCreate('PropB','窗前明月光') } build() { Column({ space: 10 }) { Text('Page1').fontSize(50).fontWeight(FontWeight.Bold) Text(`propA:${this.propA}`) Text(`propB:${this.propB}`) Button('启动SecondAbility') .onClick(() => { //1.创建Want信息载气 let wantInfo: Want = { deviceId: '', bundleName: 'com.yutianedu.myapplication', moduleName: 'entry', abilityName: 'SecondAbility' } //2.根据Want信息启动SecondAbility this.context.startAbility(wantInfo) }) } .width('100%') .height('100%') } }bash
5.2 AppStorage获取数据
在Page2中获取数据,propA建立单向同步关系,与propB建立双向同步关系。
import { router } from '@kit.ArkUI' @Entry @Component struct Page2 { //获取AppStorage中PropA、PropB属性的值,映射到变量propA、probB上 @StorageProp('PropA') propA: string = '' @StorageLink('PropB') propB: string = '' build() { Column() { Text('Page2').fontSize(50).fontWeight(FontWeight.Bold) Text(`propA:${this.propA}`) Text(`propB:${this.propB}`) Button('修改propA').onClick(() => { this.propA = '疑是地上霜' }) Button('修改propB').onClick(() => { this.propB = '疑是地上霜' }) Button('跳转到Page3').onClick(() => { router.pushUrl({ url: 'pages/Page3' }) }) } } }bash
在Page3中获取数据,propA建立单向同步关系,与propB建立双向同步关系。
import { router } from '@kit.ArkUI' @Entry @Component struct Page3 { @StorageProp('PropA') propA:string = '' @StorageLink('PropB') propB:string = '' build() { Column() { Text('Page3').fontSize(50).fontWeight(FontWeight.Bold) Text(`来自AppStorge的数据:${this.propA}`) Text(`来自AppStorge的数据:${this.propB}`) Button('修改propA').onClick(()=>{ this.propA = '低头思故乡' }) Button('修改propB').onClick(()=>{ this.propB = '低头思故乡' }) Button('回退到Page2').onClick(()=>{ router.back() }) } } }bash
6. Preferences 用户首选项
Preferences用户首选项为应用提供Key-Value键值型的数据处理能力,支持应用持久化轻量级数据,并对其修改和查询。当用户希望有一个全局唯一存储的地方,可以采用用户首选项来进行存储。Preferences会随着存放的数据量越多而导致应用占用的内存越大,因此,Preferences不适合存放过多的数据,也不支持通过配置加密,适用的场景一般为应用保存用户的个性化设置(字体大小,是否开启夜间模式)等。
6.1 运作机制
如图所示,用户程序通过ArkTS接口调用用户首选项读写对应的数据文件。开发者可以将用户首选项持久化文件的内容加载到Preferences实例,每个文件唯一对应到一个Preferences实例,系统会通过静态容器将该实例存储在内存中,直到主动从内存中移除该实例或者删除该文件。

约束限制
● 首选项无法保证进程并发安全,会有文件损坏和数据丢失的风险,不支持在多进程场景下使用。
● Key键为string类型,要求非空且长度不超过1024个字节。
● 如果Value值为string类型,请使用UTF-8编码格式,可以为空,不为空时长度不超过16 * 1024 * 1024个字节。
● 内存会随着存储数据量的增大而增大,所以存储的数据量应该是轻量级的,建议存储的数据不超过一万条,否则会在内存方面产生较大的开销。
6.2 常用接口

6.3 工具类
import { preferences, ValueType } from '@kit.ArkData' import { Context } from '@ohos.arkui.UIContext' export class PreferencesUtil { //1.写数据 public static setData(context: Context, storename: string, key: string, value: ValueType) { //1.1 获取Preferences实例 const dataPreferences = preferences.getPreferencesSync(context, { name: storename }); //1.2 写入数据 dataPreferences.putSync(key, value) //1.3 持久化到磁盘 dataPreferences.flush() } //2.读数据 public static getData(context: Context, storename: string, key: string, defaultValue?: ValueType) { //2.1 获取Preferences实例 const dataPreferences = preferences.getPreferencesSync(context, { name: storename }); //2.2 写入数据 let value = dataPreferences.getSync(key, defaultValue) return value } //3.删除数据 public static delete(context: Context, storename: string, key: string) { //3.1 获取Preferences实例 const dataPreferences = preferences.getPreferencesSync(context, { name: storename }); //3.2 删除数据 dataPreferences.deleteSync(key) //3.3 持久化 dataPreferences.flush() } //4.清空所有数据 public static clear(context: Context, storename: string) { //4.1 获取Preferences实例 const dataPreferences = preferences.getPreferencesSync(context, { name: storename }); //4.2 删除数据 dataPreferences.clearSync() //4.3 持久化 dataPreferences.flush() } }bash
6.4 保存字体大小
案例需求:如下图所示,改变字体大写和背景颜色,杀死应用后重启,字体大写和背景颜色依然保持。

import { PreferencesUtil } from '../../utils/PreferencesUtil'; @Entry @Component struct Index { items: Array<string> = Array.of('华为', '苹果', '三星', '小米', 'OPPO') @State fontSize: number = 16 @State bgColor: string = '#ffffff' //页面显示时获取字体大小,背景颜色 onPageShow(): void { this.fontSize = PreferencesUtil.getData(getContext(this), 'myStore', 'fontSize',16) as number this.bgColor = PreferencesUtil.getData(getContext(this), 'myStore', 'bgColor','#ffffff') as string console.log("字体大小:", this.fontSize) console.log("背景颜色:", this.bgColor) } build() { Column({ space: 20 }) { List() { ForEach(this.items, (item: string, index: number) => { ListItem() { Text(this.items[index]).fontSize(this.fontSize).width('100%').height(50).padding({ left: 20 }) } }) }.divider({ strokeWidth: 1, color: Color.Gray }) Slider({ step: 1, max: 20, min: 10, value: this.fontSize }) .onChange((value) => { this.fontSize = value PreferencesUtil.setData(getContext(this), 'myStore', 'fontSize', this.fontSize) }) Button('切换背景').onClick(() => { this.bgColor = this.bgColor === '#ffffff' ? '#def2ef' : '#ffffff' PreferencesUtil.setData(getContext(this), 'myStore', 'bgColor', this.bgColor) }) Button('删除数据').onClick(() => { PreferencesUtil.clear(getContext(this), "myStore") }) }.width('100%').height('100%') .backgroundColor(this.bgColor) } }bash
6.5 搜索记录

import { LengthMetrics, LengthMetricsUnit } from '@kit.ArkUI'; import { preferences, ValueType } from '@kit.ArkData'; @Entry @Component struct Index { @State searchHistory: string[] = [] onPageShow(): void { console.log("onPageShow...") const dataPreferences = preferences.getPreferencesSync(getContext(this), { name: "store" }) let searchValue = dataPreferences.getSync("searchKey", undefined) if (searchValue) { const valueArray = searchValue.toString().split("-") if (valueArray) { this.searchHistory = valueArray console.log(valueArray.toString()) } } } build() { Row() { Column() { Row() { Search().width('100%') .searchButton("搜搜", { fontColor: Color.Red }) .onSubmit((value) => { this.searchHistory.push(value) const dataPreferences = preferences.getPreferencesSync(getContext(this), { name: "store" }) if (dataPreferences) { let searchValue = dataPreferences.getSync("searchKey", undefined) if (searchValue) { //如果存在,则"-"分隔,往后面拼接 searchValue += "-" + value dataPreferences.putSync("searchKey", searchValue) } else { dataPreferences.putSync("searchKey", value) } } }) }.padding({ left: 10, right: 10 }) Flex({ space: { cross: LengthMetrics.px(10), main: LengthMetrics.px(10) }, wrap: FlexWrap.Wrap }) { ForEach(this.searchHistory as string[], (text: string) => { Text(text) .padding({ left: 10, right: 10, top: 5, bottom: 5 }) .borderRadius(10) .backgroundColor('#dedede') }) }.width('100%') .padding({ left: 10, right: 10 }) } .width('100%') .height('100%') } .height('100%') } getSize(index: number) { console.log(`Text ${index} is 更新了`); return 30 } }bash
© 版权声明
文章版权归作者所有,未经允许请勿转载。
相关文章


暂无评论...